Deploying a Shardeum Testnet Node to Get an Airdrop

Shardeum is an EVM-based, linearly scalable network, allowing for the deployment of smart contracts. The project utilizes dynamic sharding technology, ensuring appropriate decentralization and efficient scalability with an increase in the number of nodes.
We recently published a guide on how to test this network, hinting that the project might offer an airdrop. Beyond the actions outlined in that article, you could also try setting up a test node for this project, which should significantly boost your chances of receiving an airdrop. However, this time, be prepared to spend money on server costs.
A step-by-step guide
When it comes to setting up a node, the choice of server is entirely up to you.
Official requirements:
Official requirements:
- SSD storage: 250 GB
- 8-core processor
- 16 GB of RAM
- Ubuntu 20.04 operating system
Minimum Requirements:
- SSD storage: 200 GB
- 4-core processor
- 8 GB of RAM
- Ubuntu 20.04 operating system
In creating this guide, we rented a server from the Contabo website, choosing the most affordable option at 6 euros per month. On top of the rental price, there will be an additional cost for the server setup and applicable taxes. During the purchase process, you will need to create and provide a password for access.
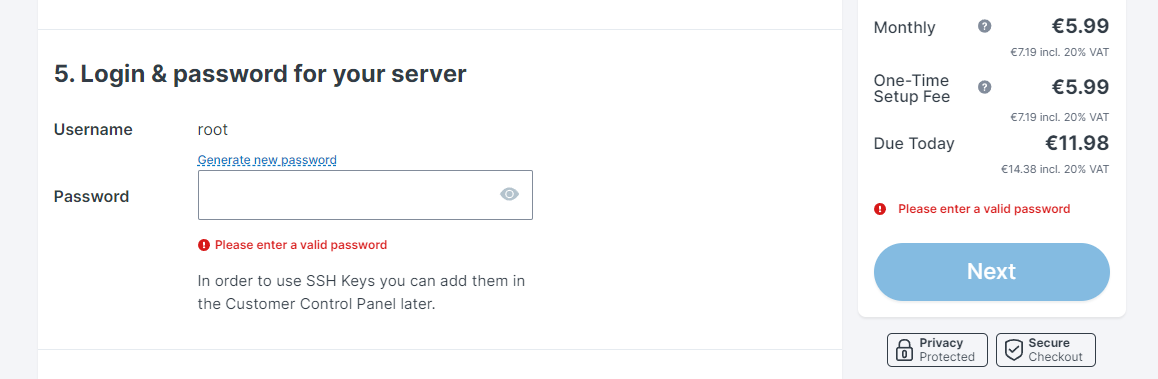
Server Payment Source: contabo.com
As soon as your server is prepared, you will receive an email that includes the IP address and the password required to access your website account. For Windows users, the PuTTY software is necessary to connect to the server. Simply input the server's IP address into the "Host Name" field, and then click on "Open". This will prompt a black window to open where you'll need to enter "root", followed by our server's password (which won't appear as you type). Following this, the window should appear as shown (with the IP address concealed):
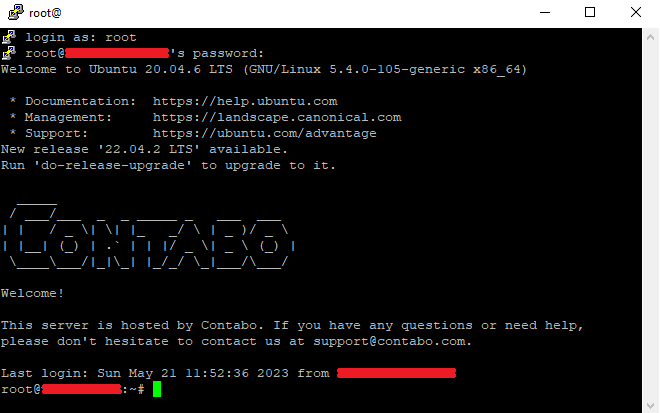
Deploying a Shardeum node through the PuTTY terminal. Source: PuTTY Terminal
Proceed by performing essential updates and install docker.io by sequentially executing the commands below (you can simply copy and paste these commands into the terminal using right-click):
sudo apt update
sudo apt install docker.io
Next, check the docker version (it should be at least version 20.10.12 or higher):
docker --version
Proceed to download docker-compose and adjust permissions:
sudo curl -L "https://github.com/docker/compose/releases/download/1.29.2/docker-compose-$(uname -s)-$(uname -m)" -o /usr/local/bin/docker-compose
sudo chmod +x /usr/local/bin/docker-compose
Now, verify your docker-compose version (it should be at least 1.29.2 or higher):
docker-compose --version
Proceed with the node installation:
curl -O https://gitlab.com/shardeum/validator/dashboard/-/raw/main/installer.sh && chmod +x installer.sh && ./installer.sh
Throughout the installation process, the terminal will prompt for a password to be used for accessing the node control panel. You will need to invent and provide this. You'll also face questions regarding ports and IP addresses. You can simply press "Enter" for these to choose the default settings. At the end of this, the terminal window should resemble the following:
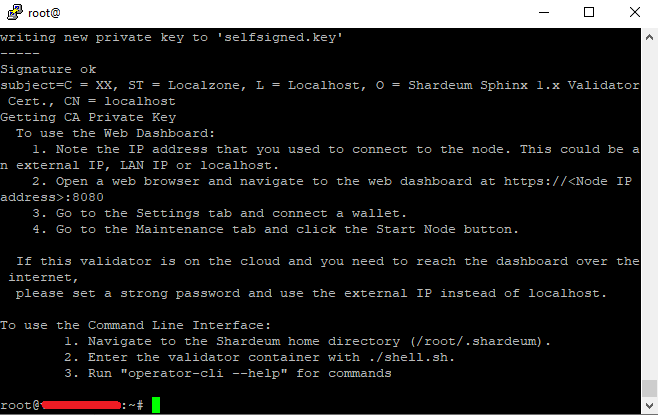
Deploying a Shardeum node through the PuTTY terminal. Source: PuTTY Terminal
To start the validator panel, sequentially execute the following commands:
cd
cd .shardeum
./shell.sh
operator-cli gui start
operator-cli gui start
operator-cli start
Once you've completed these steps, you can close the terminal. Now, launch a browser and input https://ip:8080/ and make sure to replace "IP" with your server's actual IP address. Be aware that your browser may block access to this address, in which case you'll need to permit it. Next, input the password you set during the node installation process. You should now be presented with the validator information panel, which should look something like this:
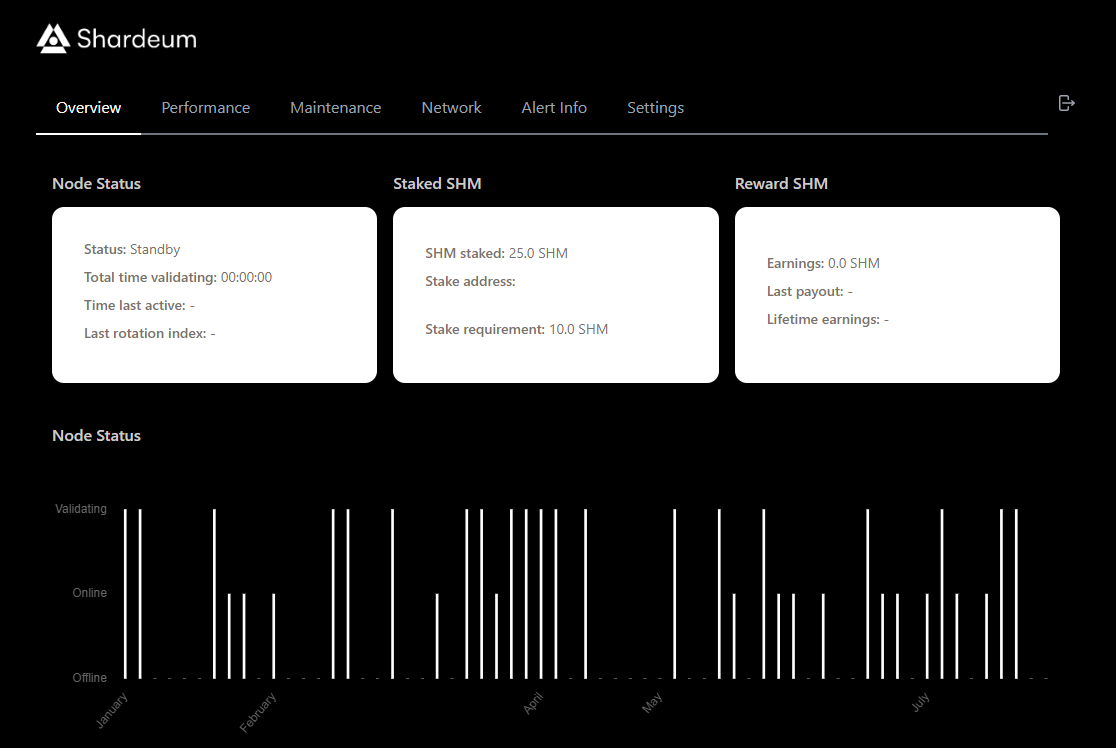
Node status information Source: Shardeum Node Control Panel
Now we need to send the test coins SHM for staking. Follow the link and add the Sphinx 1.X network to your Metamask wallet by clicking the corresponding button:
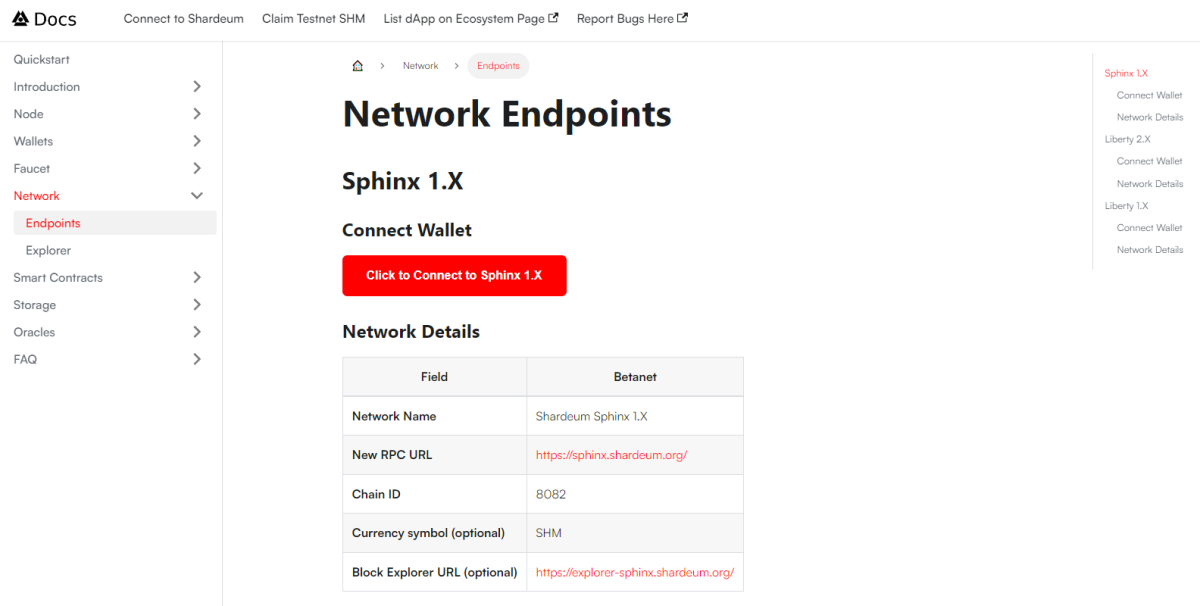
Adding the Sphinx 1.X Network. Source: docs.shardeum.org
The next step is to receive the test tokens. Click the link and press the "Tweet Now" button. This will create a tweet on Twitter where you need to provide the address of your Metamask wallet. Once the tweet is posted, copy its link using the "share" button and paste it into the designated field on the website page. You can also obtain test tokens from the "sphinx-faucet" channel on Discord.

Receiving test tokens SHM Source: faucet-sphinx.shardeum.org
Next, go back to the validator panel and navigate to the "Maintenance" tab. Connect your Metamask wallet and stake 10 or more SHM tokens. Just ensure that you have enough tokens to cover the network fee.
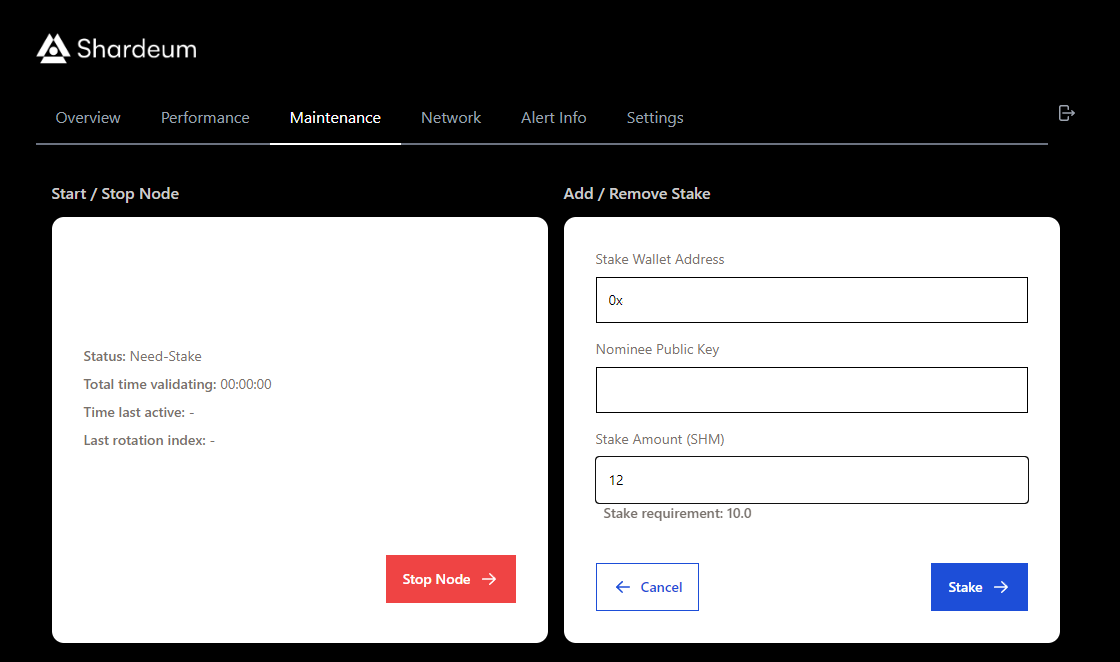
Staking test tokens SHM Source: Shardeum Node Control Panel
Great! Remember to periodically check if everything is functioning correctly. Also, stay updated with the latest news on Shardeum Discord, as occasionally the node may require updates. It's also a great place to interact with other validators by joining the relevant channel.

Dmytro Litvinko
Author
Has been exploring the enigmas of the crypto industry since 2017, transforming them into accessible narratives. Relies on dark chocolate and nuts as a secret source of energy and inspiration.